The Labyrinth of Springs: A Beginner's Guide to Typewriter Disassembly
There's a quiet beauty in obsolescence. It's a hum of forgotten mechanics, a patina of time that speaks of countless stories written and lost. Antique typewriters embody this beauty perfectly. They weren't just machines; they were portals – portals to a different era of communication, of artistry, of the slow, deliberate crafting of words. For those drawn to these intricate relics, the journey often leads to the inevitable: the desire to understand them, to breathe life back into them. And that journey, often, begins with disassembly.
I remember my first typewriter. A Smith-Corona Silent, rescued from a dusty corner of an estate sale. Its keys stuck, its carriage was seized, and the overall impression was one of profound neglect. I wasn't a mechanic, just a fascinated observer, yet I felt compelled to bring it back from the brink. The prospect of taking it apart was daunting – a mechanical beast seemingly assembled by a madman – but the allure of understanding its inner workings proved irresistible.
Disassembly isn't about destruction; it's about comprehension. It’s about gaining a profound respect for the craftsmanship involved, for the ingenuity of the engineers and the skill of the assembly workers. Each tiny screw, each precisely shaped lever, each carefully coiled spring, speaks of a dedication to detail that’s rarely seen in modern manufacturing. It's a tangible connection to a time when things were built to last. The evolution of these machines is fascinating; the subtle changes in layout and design reflect the changing needs and aesthetics of the time. You might even find that mapping the evolution of a single model is an illuminating exercise, as described in mapping the legacy of a single model.
A Gentle Introduction: Tools and Preparation
Before you even touch a single screw, preparation is key. Don’t rush. A hasty disassembly is more likely to result in lost parts and unnecessary damage. You'll need a few basic tools: a set of small screwdrivers (Phillips and flathead), a pair of tweezers, a small pick, and, critically, a well-lit workspace. A photography setup, even just your phone's camera, is invaluable. Photograph each step of the process. Trust me, you'll thank yourself later when reassembly seems like a distant dream.
There’s also the matter of lubricants. Don't use WD-40. It's a solvent, not a lubricant, and it can damage vintage finishes. Instead, consider a dedicated typewriter oil or a light machine oil. Have some cotton swabs and soft cloths on hand for cleaning.
Understanding the Architecture: Common Typewriter Families
While each typewriter is unique, they generally fall into a few broad categories, each with its own quirks. Early "visible" typewriters, like the Remington No. 2, are particularly challenging, with their external typebars. "Blind" typewriters, like many later models, are more accessible, but still complex. Portable typewriters, hugely popular in the mid-20th century, are often simpler in construction but can suffer from corrosion due to their frequent travel. It's remarkable how even subtle variations in design can influence the overall experience. Understanding the historical context of these differences, and even documenting them, reveals how these machines responded to evolving user needs and design philosophies.
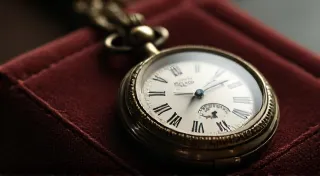
Knowing the general construction of your model can significantly streamline the process. Remington, Underwood, Royal, Smith-Corona – each manufacturer had its own design philosophies, and understanding these nuances will inform your approach. Beyond the mechanical aspects, a keen eye can even discern the approximate manufacturing period based on subtle details, much like a skilled horologist might date a chronometer. This meticulous observation extends to more than just mechanics; it’s a journey into history itself.
Step-by-Step: A General Disassembly Guide
Let's outline a general approach. Keep in mind this isn’t a universal guide; consult specific repair manuals for your model if possible. Always photograph each step!
- Remove the Type Cover and Carriage Return Lever: These are often secured by a few easily accessible screws. Note their orientation for reassembly.
- Detach the Keyboard Cover: This is usually held in place by a retaining clip or screws.
- Release the Paper Feed Rollers: These are critical. Don't force them; look for release levers or screws.
- Disassemble the Typebar Mechanism: This is where the labyrinth truly begins. Start by releasing the platen knob and then carefully work your way through the typebar levers, springs, and linkages. Pay close attention to the order of the parts.
- Remove the Platen (Cylinder): This usually involves releasing retaining screws or levers. The platen is heavy and can be damaged if handled carelessly.
- Detach the Carriage Rail Covers: These are often held on with screws and clips.
- Finally, Separate the Frame: The typewriter’s frame is typically held together by a series of screws and bolts.
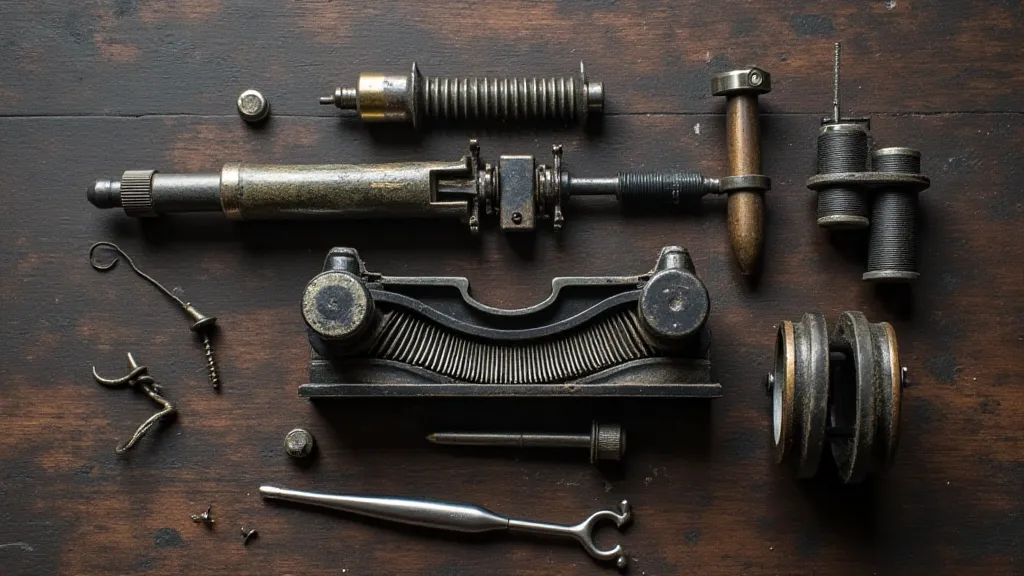
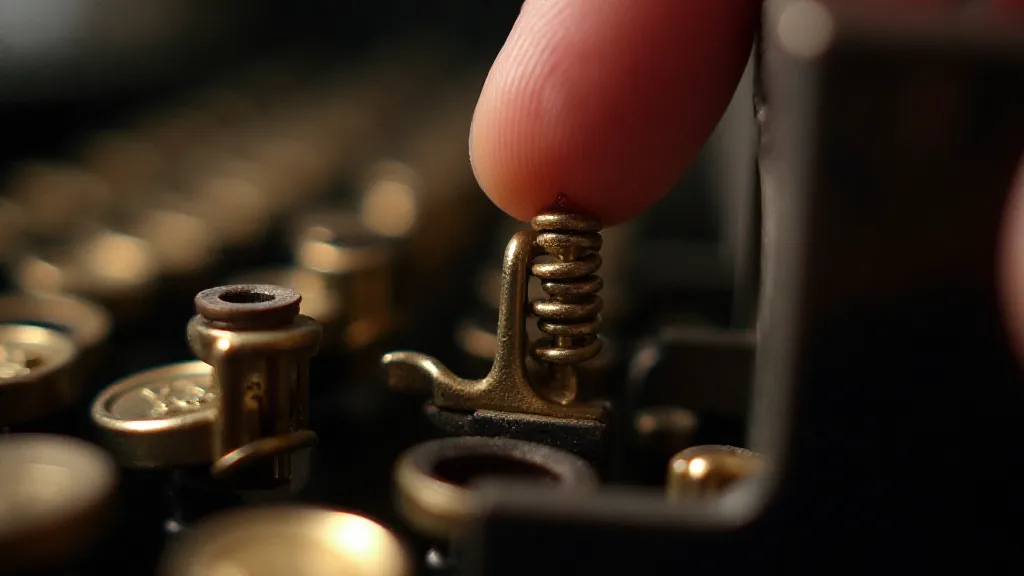
The Springs: Navigating the Tight Spaces
The springs. They are the essence of a typewriter’s action—the subtle, precisely calibrated force that translates keystrokes into impressions. They're also the most frustrating part of disassembly. They’ll jump, they’ll get tangled, and they’ll seem to disappear into the abyss. Patience is paramount. Use tweezers to carefully manipulate them. A magnetic parts tray is an invaluable tool. And remember: photograph everything!
Many of the springs are intricately shaped and serve specific functions. Don’t assume they are interchangeable. A misplaced spring can render the typewriter unusable. Mark them, label them, photograph them – do whatever it takes to keep them organized. The design and placement of these springs, along with the overall layout of the keys, has evolved over the years, influenced by factors ranging from ergonomic considerations to aesthetic preferences. Tracing this evolution is fascinating.
More Than Mechanics: Appreciating the Craftsmanship
Disassembly isn's merely a technical exercise; it’s a lesson in history, a window into the soul of an era. As you meticulously examine each component, you're not just understanding the mechanics; you’re appreciating the artistry. Consider the delicate engraving on a lever, the precise casting of a screw, the elegant curve of the platen. These aren’t mass-produced items; they’re the result of skilled hands and a dedication to quality. Understanding the meticulous process by which these machines were made offers a valuable insight into a different age – one where durability and artistry were paramount. You might even find inspiration for your own creative endeavors by considering the combination of traditional writing techniques with the mechanical precision of a typewriter, similar to the insights explored in combining typewriter art with traditional writing techniques.
That feeling—the profound respect for the human effort embodied in these machines—is what makes typewriter restoration so rewarding. It's a connection to the past that transcends mere mechanics.
Reassembly: The Ultimate Test
Disassembly is only half the battle. Reassembly is the ultimate test of your understanding. Take your time. Refer to your photographs. If you’re stuck, revisit your disassembly notes and diagrams. And don’t be afraid to ask for help from online communities or experienced restorers. The satisfaction of bringing a silent machine back to life is immense, but the process requires meticulous attention to detail and a deep understanding of how all the components interact.
The joy of seeing an antique typewriter, once silent and immobile, spring back to life is unparalleled. It's a testament to your patience, your skill, and your appreciation for the enduring beauty of mechanical ingenuity. It's worth noting that the accuracy required for reassembly is a testament to the precision of manufacturing practices of the time, and this attention to detail has led some enthusiasts to explore dating antique typewriters using manufacturing details, as described in dating antique typewriters through manufacturing details.
Beyond the practical aspects of repair and restoration, the endeavor offers a profound appreciation for the ingenuity and craftsmanship of a bygone era, a journey that extends far beyond mere mechanics.